Configuring the iPhone - Sending and Receiving Mail
This tech note is designed as a template that you should customize before distributing to your iPhone users. Any Blue Text within this document is information for you, the administrator, to read and edit appropriately before giving this document to your user base.
Configuring the iPhone to send and receive mail
Tap Settings
Tap Mail, Contacts, Calendars
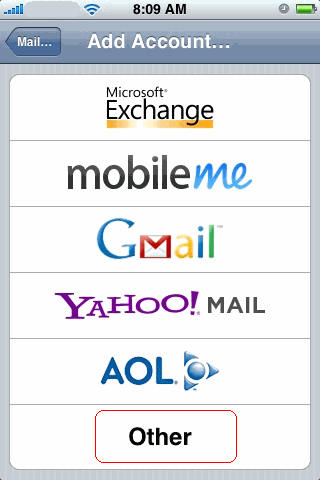
Tap Add Account
Tap Other
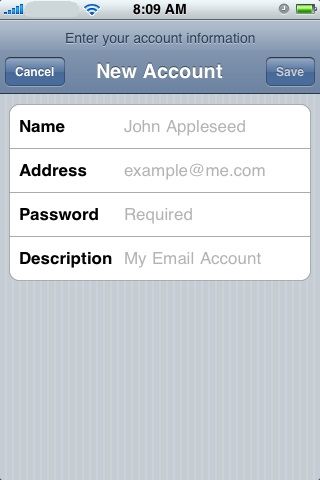
Enter your Name, FirstClass E-mail Address and account Password, then tap Save
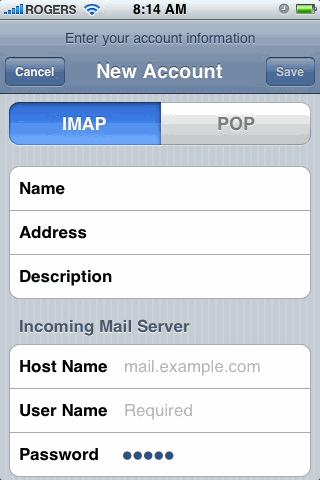
Select <choose IMAP or POP>
Incoming Mail Server
The Name, Address, Description and Password fields will already be filled in from the previous screen.
Host Name: <The domain name or IP address that points to FirstClass Internet Services>
User Name: Your FirstClass userID
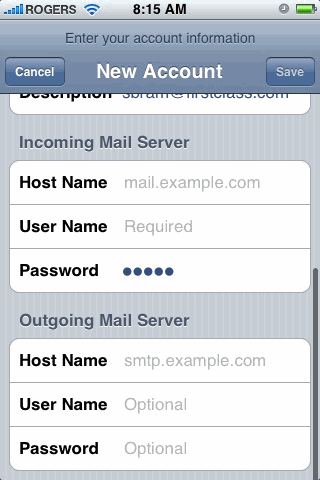
Scroll down to access the rest of the page
Outgoing Mail Server
Host Name: <The domain name or IP address that points to FirstClass Internet Services>
User Name: Your FirstClass UserID
Password: Your FirstClass Password
Tap Save
Note for admins: For the user to relay mail through FirstClass they will need the Allow Mail Relay permission enabled on their account, and FirstClass Internet Services will need to be accessible on port 25 (SMTP) or port 587 (SMTP Submission). If you need help configuring SMTP Submission, please click this link
<If you have SSL enabled for IMAP/ POP3 and SMTP you can remove this next screenshot and its accompanying text. For most sites it should remain>
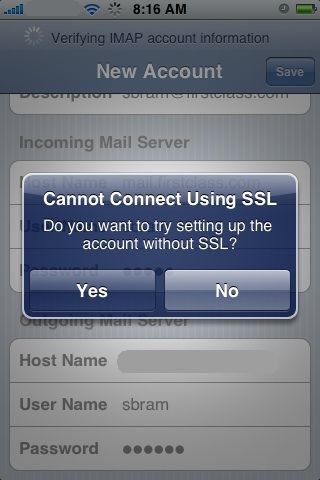
You will see the following "Cannot Connect" message once or twice. Click Yes each time.
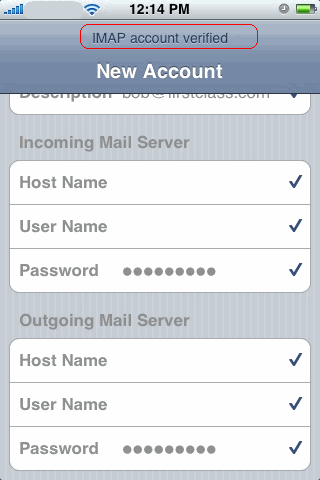
If all information has been entered correctly, you will (very briefly) see IMAP <POP> account verified, and your setup is complete! If the device instead reports an error, you should make sure your phone is currently able to access a data network, and verify you entered all information correctly. If you continue to have setup problems, please contact <Local Help desk number / email address> for assistance.


